Please disable your adblock and script blockers to view this page

Search this blog

Monday, 21 January 2019

Unit testing of ADF Application using JUnit

 JUnit is a unit testing package for Java language and can be used to test Oracle ADF applications as ADF is built on top of the J2EE framework. Unit testing is basically is a process to verify the smallest testable module against some defined test criteria. Here I am going to illustrate how can we set up and use JUnit in JDeveloper 12.2.1.3 to test the ADF application.

JDeveloper 12.2.1.3 comes with a JUnit extension so no need to install it separately. Let's start by creating a Fusion Web Application in JDeveloper IDE. Here I am taking Departments table of default HR Schema to prepare the model for ADF Application.


The next step is to create a new project to hold unit tests so that the whole application doesn't look ambiguous. Right-click on the Application name and select New–> From Gallery–> General–> Projects --> Java Project 


Put a name for that project and click on the Finish button.


Now next step is to create a Test Suite for business components and before that, we should know some terminology that is used in unit testing.

Test Suite- A group of Test Cases

Test Fixture- A class to handle long-running test cases and keep the state of multiple test cases.

Assertation- To check the result of a test case against the expected result.

Now to open the test suite wizard, Right-click on new project and select New–> From Gallery–> General–> Unit Tests --> ADF Business Components Test Suite


Click on the OK button and configure the test suite. You can see that here I have selected the Model project and DeptAm application module to test. You need to select Configuration for database connection too and here I have selected DeptAMLocal.


Click on the Next button and see that this wizard will generate a Test Suite class and a Test Fixture class. This wizard will also generate separate unit test classes for each view object in the application.


Now click on Finish button and you can under new project all files are created.

DeptAmFixture.java- Test Fixture Class

AllDeptAMTests.java- Test Suite Class

DepartmentsVO1VOTest.java- Unit Test Class for Departments ViewObject


Now open DepartmentsVO1VOTest.java class and look at the default test case that checks that the Department View Object should not be null.

You can see here @Test annotation, this indicates that this java method is a unit test and after performing test assert is used to verify the test result.

  1. @Test
  2. public void testAccess() {
  3. ViewObject view = fixture1.getApplicationModule().findViewObject("DepartmentsVO1");
  4. assertNotNull(view);
  5. }
  6. @Before
  7. public void setUp() {
  8. }
  9. @After
  10. public void tearDown() {
  11. }

To check this default test case, Right-click on the test suite class and select run. You can see that the unit test execute successfully.


The next step is to create some of the own unit tests, I have created this unit test that checks that the Department Id should not be null in a newly created row.

  1. @Test
  2. public void checkDeptIdNotNull() {
  3. ViewObject deptVo = fixture1.getApplicationModule().findViewObject("DepartmentsVO1");
  4. Row newRow = deptVo.createRow();
  5. newRow.setAttribute("DepartmentId", 222);
  6. newRow.setAttribute("DepartmentName", "Testing");
  7. assertNotNull("DepartmentId should not be null", newRow.getAttribute("DepartmentId"));
  8. }

So in the above code, I have created a new row in Department's view object and set 222 in Department Id. Now run this test case.


You can see here that the test is passed successfully because Department Id is not null, That's great. Now comment this line in the code

//newRow.setAttribute("DepartmentId", 222);

and run the test again


See that test is failed with AssertionError as Department Id is null this time. This is how we can write our own unit tests to check.

Here I am writing one more test case to check whether the department is in the database or not. I am passing 1990 as department id that is not in the database.

  1. @Test
  2. public void findDepartment() {
  3. ViewObject deptVo = fixture1.getApplicationModule().findViewObject("DepartmentsVO1");
  4. int deptId = 1990;
  5. Row row[] = deptVo.findByKey(new Key(new Object[] { deptId }), 1);
  6. Integer count = row.length;
  7. //assertTrue fails when second parameter evaluates to "false"
  8. assertTrue("Department Not Found", count.compareTo(0) == 1);
  9. }

Let's see the result


This is how we configure and use JUnit in the Oracle ADF Application for Unit Testing.

Cheers 🙂 Happy Learning

Thursday, 10 January 2019

Hide Icon and Heading of FacesMessage using ADF Skin

 Recently a developer asked me about how to hide the icon and heading of FacesMessage. So here I am posting a small CSS that does the trick.

Previously I have posted about resizing FacesMessage and skinning ADF Dialog component inside the popup, You can check these posts for more details about skin selectors

Check How to Show FacesMessage in Oracle ADF?

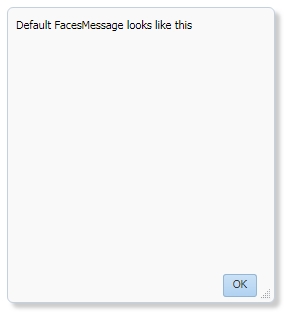
By default, Error FacesMessage in ADF Application looks like this


Now create a Skin in view controller project and write this simple piece of CSS. This CSS basically hides the header part of dialog that is used in creating FacesMessage.

  1. af|dialog::header, af|dialog::header-end, af|dialog::header-start {
  2. display: none;
  3. }

and FacesMessage looks like this


That's All

Cheers 🙂 Happy Learning

Tuesday, 8 January 2019

Consuming JSON based REST Web Service in ADF 12.2.1.3

 Previously I have posted about consuming ADF BC based REST Web Service in ADF. Now, this post talks about consuming JSON based REST Web Service using generic data control.

You can also look at previous posts on Web Service for more information.

Create SOAP Web Service with Application Module quickly in ADF 12.2.1

Create REST Web Service with Application Module declaratively in ADF 12.2.1

Consuming a SOAP Web Service quickly using Web Service Data Control (WSDL) in ADF

Create POJO based JAX-WS WebService easily with JDeveloper 12.1.3

Populate data in ADF Table using Web Service Data Control

Populate select one choice using Web Service Data Control in ADF Application

Access JAX-WS web service from Java Class using Web Service Proxy in JDeveloper

In this post, I am using a free REST API Web Service to get all countries' names. Check the below link for detail of Web Service methods.

RESTful web-services to get and search Countries

Let's see how to implement this in JDeveloper 12.2.1.3

Create a Fusion Web Application with default Model and View Controller projects.


Right-click on the View Controller project and Select New–> From Gallery–> Business Tier–> Web Services and select Web Service Data Control SOAP/REST 


It opens Web Service Data Control creation wizard, Select REST as Web Service type and provide a meaningful name, Generic Data Control with manually described resources as the type of data control.


Click on the green plus icon to create new ADF Rest Connection, Enter connection name and URL of the web service.

Here URL of web service is http://services.groupkt.com/country/get/all and I am using http://services.groupkt.com/country/get, /all is left here as it'll be used later. Select authentication type none and test connection.


Click on OK and you can see that the REST connection is created. Click on the next button and skip OWSM policies and come to the Resources tab.

Now click on the green plus icon and add /all as the resource path, select GET method checkbox and put a name for the method and set JSON as Data Format.


Click on the Next button and set method payload, Select Parse from Sample Code and access web service from the browser and paste the code in Response Sample.

For this post click on this link to copy the sample response - http://services.groupkt.com/country/get/all


Click on Next and Test Rest Connection.


With the click of the finish button, a file DataControls.dcx is generated. This is a data control definition file and contains information about data collection nodes and built-in data collection operations.


Now consuming web service part is done and the next is to create a page and use WSDL to show a table on that page.

Right-click on the view controller and select New–> From Gallery–> Web Tier–> JSF/Facelets and create a new page


Expand Data Controls section of Fusion Web Application and you can see there a get() method and under it the message and result data collection.

Drop get() method as a button and both collections as the table on the page and run application.


All done :)

Sample ADF Application (Jdev 12.2.1.3) - Download

Cheers 🙂 Happy Learning

Thursday, 3 January 2019

Using Bean Data Control in Oracle ADF

 This post talks about a basic requirement that is creating bean data control in an ADF Application. Here I'll show you how to create POJO based Java class and use it as data control to populate data on the page.

Let's start by creating a fusion web application with a model and view controller project


Now create a POJO class PersonDetail in the model project, This class represents a person and captures his details like name, date of birth and phone number.

  1. package beandatacontrol.model.bean;
  2. public class PersonDetail {
  3. public PersonDetail() {
  4. // TODO Auto-generated constructor stub
  5. }
  6. public PersonDetail(String name, String phoneNo, String dateOfBirth) {
  7. this.name = name;
  8. this.phoneNo = phoneNo;
  9. this.dateOfBirth = dateOfBirth;
  10. }
  11. private String name;
  12. private String phoneNo;
  13. private String dateOfBirth;
  14. public void setName(String name) {
  15. this.name = name;
  16. }
  17. public String getName() {
  18. return name;
  19. }
  20. public void setPhoneNo(String phoneNo) {
  21. this.phoneNo = phoneNo;
  22. }
  23. public String getPhoneNo() {
  24. return phoneNo;
  25. }
  26. public void setDateOfBirth(String dateOfBirth) {
  27. this.dateOfBirth = dateOfBirth;
  28. }
  29. public String getDateOfBirth() {
  30. return dateOfBirth;
  31. }
  32. }

The second class is Society that holds the list of people and it goes like this.

  1. package beandatacontrol.model.bean;
  2. import java.util.ArrayList;
  3. import oracle.binding.AttributeContext;
  4. import oracle.binding.RowContext;
  5. public class Society {
  6. public ArrayList<PersonDetail> person = new ArrayList<PersonDetail>();
  7. public Society() {
  8. super();
  9. if (person.size() == 0) {
  10. person.add(new PersonDetail("Ashish Awasthi", "+91672938", "02/01/1991"));
  11. person.add(new PersonDetail("Shyam Kumar", "+91345545343", "06/09/1991"));
  12. person.add(new PersonDetail("Alex Smith", "+458954638", "08/02/1991"));
  13. person.add(new PersonDetail("Raghav Mani", "+914512698", "09/06/1991"));
  14. person.add(new PersonDetail("Ahmad Sheikh", "+7459654245", "12/05/1991"));
  15. }
  16. }
  17. public void setPerson(ArrayList<PersonDetail> person) {
  18. this.person = person;
  19. }
  20. public ArrayList<PersonDetail> getPerson() {
  21. return person;
  22. }
  23. }

Now right click on Society class and select Create Data Control


In the next step, I have selected Custom CRUD operation support in ADF Data Control Features


Click on Next and don't change access mode, the default value is Scrollable


Click on Finish and you can see all the details


Now you can see a DataControl.dcx file is created in the project, In short bean data control is ready for use.


Right-click on the view controller project and create a page and drop person data control on the page as ADF table. Also, drop create operation as a button and run the application.


Check to create button, click on that and see a new row added in the ADF table.


Cheers 🙂 Happy Learning